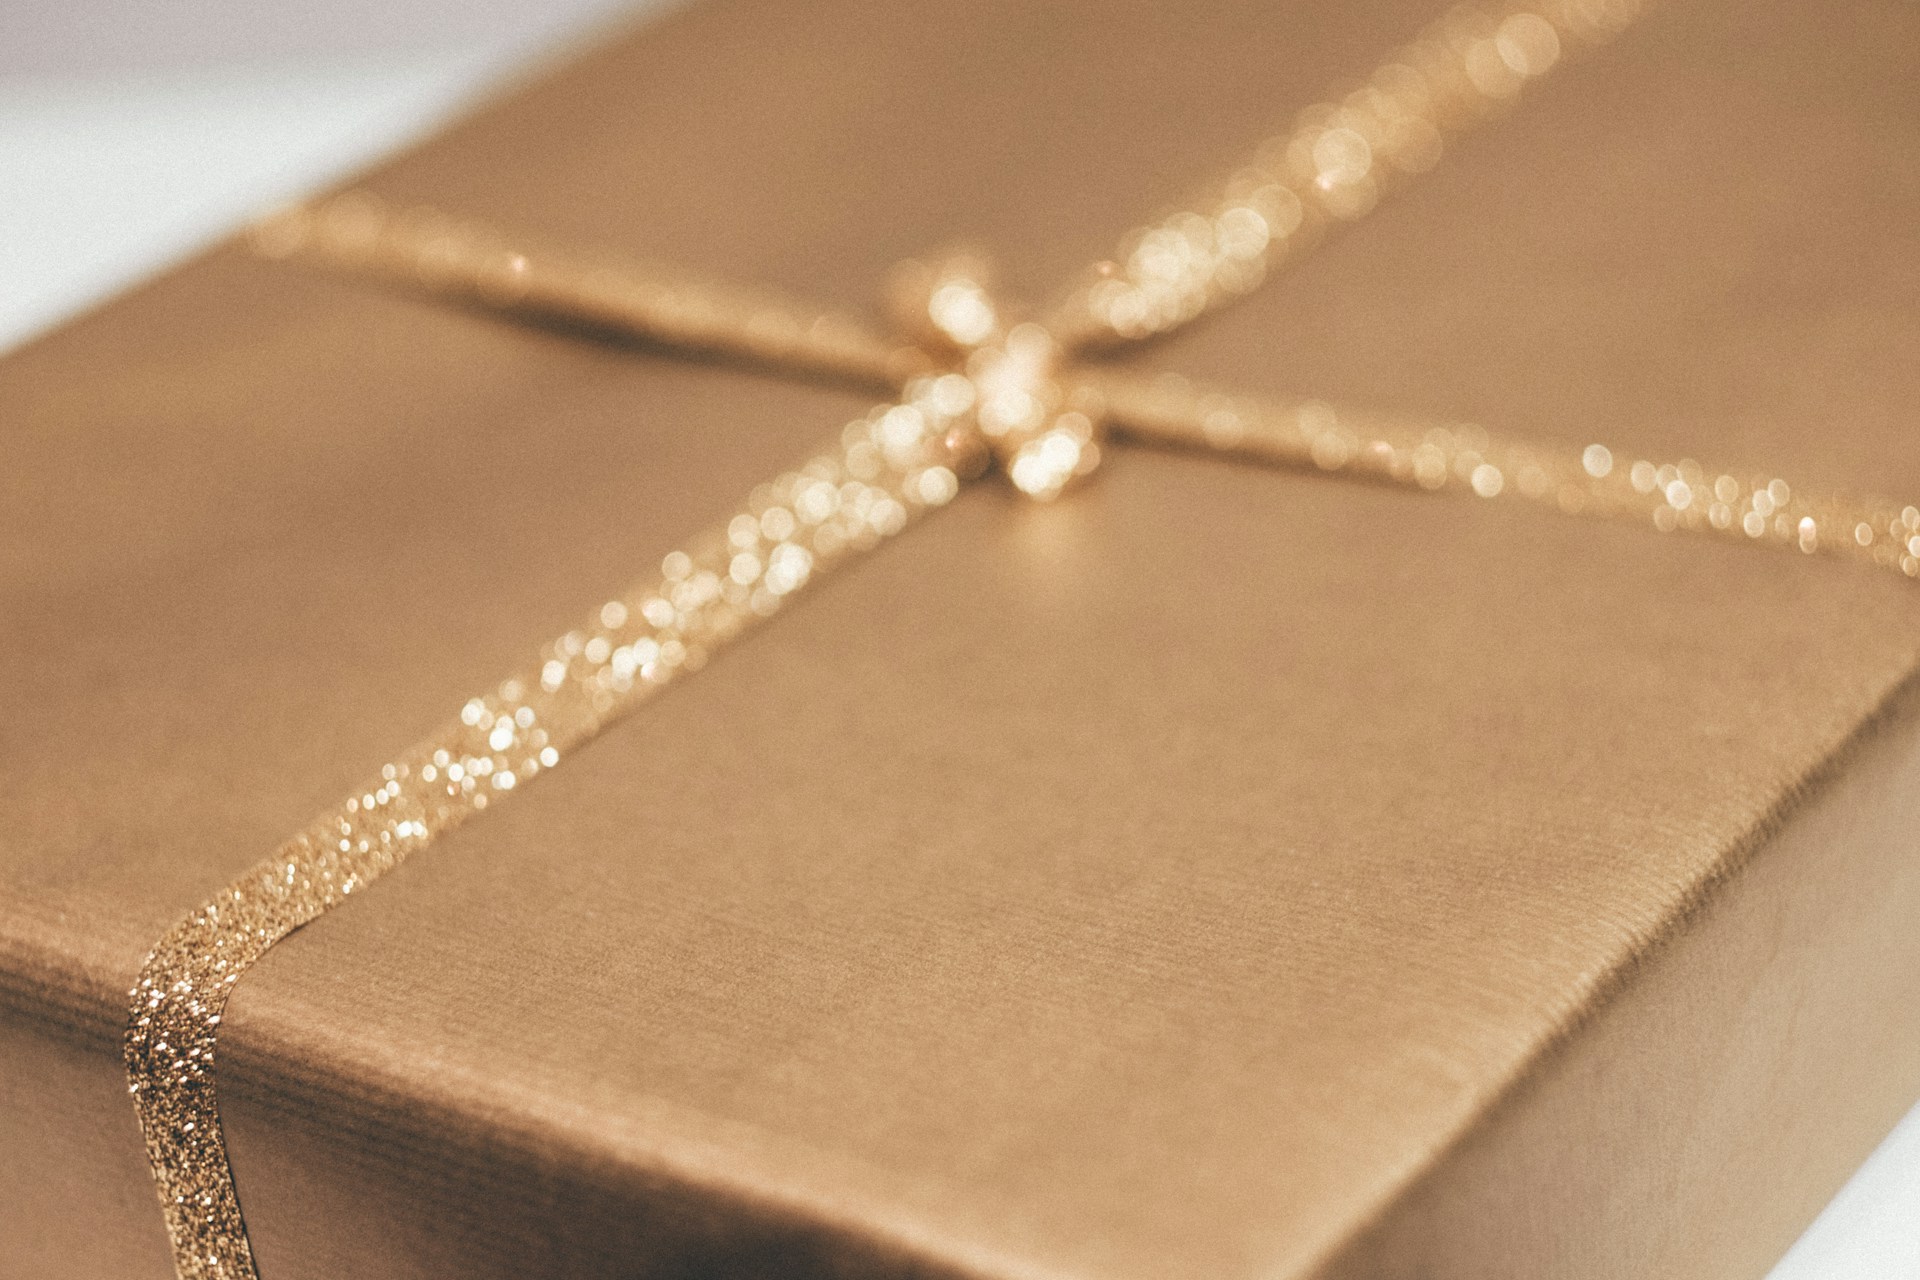
The art of gift wrapping is an essential part of presenting a thoughtful gift, and adding a ribbon is the final touch that can elevate the entire look. Whether you’re wrapping a birthday present, a holiday gift, or a wedding favor, a beautifully tied ribbon adds elegance, charm, and personal flair. Knowing how to tie a ribbon on a gift can make your present stand out, leaving a lasting impression on the recipient.
At PackAQ, we offer high-quality printed ribbons, helping you make every gift look polished and personalized. In this guide, we’ll walk you through the process of tying a ribbon on a gift, along with tips on choosing the right ribbon and experimenting with different styles to suit various occasions.
1. Why Ribbons Enhance Your Gift Wrapping
Before we dive into the techniques of tying ribbons, it’s important to understand why ribbons are such an essential part of gift wrapping.
a. Adds Elegance and Sophistication
A well-tied ribbon brings a touch of elegance to any gift. Even the simplest wrapping paper can look extraordinary with the addition of a ribbon bow. Satin, grosgrain, or organza ribbons can instantly elevate the presentation, turning an ordinary gift into something special. For formal occasions such as weddings or anniversaries, a ribbon can make the gift appear more refined and thoughtful.
b. Shows Thoughtfulness
When you take the time to add a ribbon to your gift, it shows that you’ve put in extra effort. A carefully tied ribbon can make the gift feel more personal and meaningful, reflecting the time and care you’ve invested in its presentation. Customizing the ribbon with colors, patterns, or even printed messages allows you to add a personal touch that truly reflects the occasion and the recipient.
c. Customizable for Any Occasion
Ribbons come in various materials, colors, and styles, making them incredibly versatile for any occasion. Whether it’s a festive holiday, a formal event, or a casual celebration, there’s a ribbon that will perfectly suit the mood. At PackAQ, our printed ribbons allow you to customize your ribbon with personal messages, logos, or names, making it ideal for corporate gifts, weddings, and birthdays.
2. Materials You’ll Need
Before you start tying a ribbon on your gift, make sure you have the necessary materials:
- Ribbon: Choose a ribbon that complements the wrapping paper and the occasion. Satin, grosgrain, organza, and printed ribbons are all great choices depending on the style you want.
- Wrapping Paper: If the gift hasn’t already been wrapped, select wrapping paper that matches the theme or color scheme of your ribbon.
- Scissors: Sharp scissors are essential for cutting the ribbon cleanly and creating decorative edges like angled cuts or V-shaped notches.
- Double-Sided Tape: This can help secure the ribbon in place if needed, especially for larger or more intricate bows.
3. Step-by-Step Guide to Tying a Classic Ribbon Bow
The classic bow is a timeless technique that works well for most gifts. It’s simple, elegant, and can be adjusted for different sizes and types of ribbons.
Step 1: Measure and Cut the Ribbon
Begin by measuring the ribbon. You’ll need enough to wrap around the gift and still have extra length to tie the bow. A good rule of thumb is to measure about three times the length of the gift box, so you have ample ribbon for wrapping and tying. If you’re using PackAQ’s printed ribbons, make sure the logo or message is positioned prominently on the bow.
- Cut the ribbon to the desired length, ensuring you have enough for a generous bow.
- If you want to add extra flair, cut the ends of the ribbon at an angle or in a V-shape.
Step 2: Wrap the Ribbon Around the Gift
Now it’s time to wrap the ribbon around the gift. You can use the classic cross-wrap technique or a simple single-wrap around the box, depending on your preference.
- Lay the gift box face-down on the ribbon, with equal lengths of ribbon on either side.
- Bring both ends of the ribbon around the gift, crossing them at the back to create an “X” shape.
- Bring the ribbon ends back to the front of the gift and cross them again at the top.
Step 3: Tie a Knot
Once the ribbon is securely wrapped around the gift, tie a knot at the center of the box where the two ends meet. This knot will serve as the foundation for your bow, so make sure it’s snug but not too tight.
- Hold both ends of the ribbon and tie a simple knot at the top of the box.
- Make sure the knot is centered and that the ribbon lies flat against the gift.
Step 4: Create the Loops
Now it’s time to create the bow loops. This is where the gift’s appearance really starts to take shape.
- Hold one end of the ribbon in each hand and create a loop with each side. These loops will become the “ears” of your bow.
- Cross one loop over the other, just like tying shoelaces.
- Pull the loop under the crossed ribbon and through the knot to create the bow.
- Gently tug on the loops to tighten the bow and adjust its size.
Step 5: Adjust and Trim the Ribbon
Once the bow is tied, you can adjust the loops and ribbon tails to your liking. Make sure the loops are even and that the bow sits neatly on top of the gift. You can also fluff the loops for a fuller look.
- If the ribbon ends are too long, trim them with scissors. You can cut the ribbon ends at an angle for a sleek look or create a V-shaped notch for a more decorative finish.
- Secure the bow in place with double-sided tape if needed, especially if the ribbon is slipping.
4. Creative Ways to Tie Ribbons on Gifts
While the classic bow is always a great choice, there are plenty of other creative ways to tie ribbons on gifts. These techniques add variety and allow you to customize the wrapping to fit the occasion.
a. Layered Ribbons
Layering different types of ribbons adds texture and dimension to your gift wrapping. You can combine a satin ribbon with a thinner grosgrain ribbon or use a printed ribbon on top of a solid-colored one for contrast.
- Start by wrapping the base ribbon (the wider one) around the gift.
- Tie a second, narrower ribbon on top of the base ribbon for a layered effect.
- Finish by tying a simple bow or knot with both ribbons together.
b. Double Bow
A double bow is a fuller, more elaborate version of the classic bow. It’s perfect for larger gifts or when you want to create a statement piece with your wrapping.
- Instead of tying a single bow, make two loops on each side of the knot before crossing them to form the bow.
- Once the bow is tied, adjust the loops so that they sit on top of each other, creating a double-layered bow.
- Trim the ends of the ribbon for a neat, polished look.
c. Twisted Ribbon Bow
For a unique, textured look, try creating a twisted ribbon bow. This technique works well with grosgrain or organza ribbons that hold their shape.
- Wrap the ribbon around the gift as usual and tie a knot at the center.
- Instead of tying a traditional bow, twist each end of the ribbon several times to create a spiral effect.
- Cross the twisted ribbons over each other and secure with a knot or small bow at the center.
5. Final Touches: Adding Embellishments to Your Ribbon Bow
Once your ribbon is tied, you can take your gift wrapping to the next level by adding embellishments. Small decorative elements can make your gift look even more personalized and festive.
a. Attach a Gift Tag
A custom gift tag tied to the ribbon adds a personal touch to your gift. You can include the recipient’s name, a special message, or a holiday greeting. PackAQ’s luxury paper bags and printed ribbons pair beautifully with personalized tags, creating a cohesive and professional look.
b. Add a Charm or Ornament
For a more festive presentation, consider attaching a small charm or ornament to the bow. This works particularly well for holiday gifts or special occasions like weddings and anniversaries.
- Tie a small charm, such as a snowflake or heart, to the ribbon for added decoration.
- For holiday gifts, tuck a mini ornament or sprig of greenery into the bow.
c. Use Floral Accents
Adding flowers or greenery to your ribbon bow can enhance the beauty of your gift wrapping, especially for weddings or springtime events.
- Tuck a small flower or leaf into the knot of the bow for a fresh, natural look.
- Secure the floral accents with tape or a small piece of wire if needed.
Tying a ribbon on a gift is a simple yet effective way to make your present stand out. Whether you’re using a classic bow or experimenting with creative ribbon techniques, the right ribbon can add elegance and personality to any gift.
At PackAQ, we offer a wide selection of printed ribbons that make gift wrapping even more special. Whether you’re wrapping a small gift or preparing a larger present for a formal occasion, our ribbons and packaging solutions help you create a professional and polished presentation.
Ready to elevate your gift wrapping? Explore PackAQ’s collection of custom printed ribbons and luxury packaging options today!