My parents are awesome.
My mom made me beautiful handmade scrapbooks of my childhood. My dad condensed 30 years worth of videos into a DVD set for each of my siblings and I. I treasure these gifts and revisit them often.
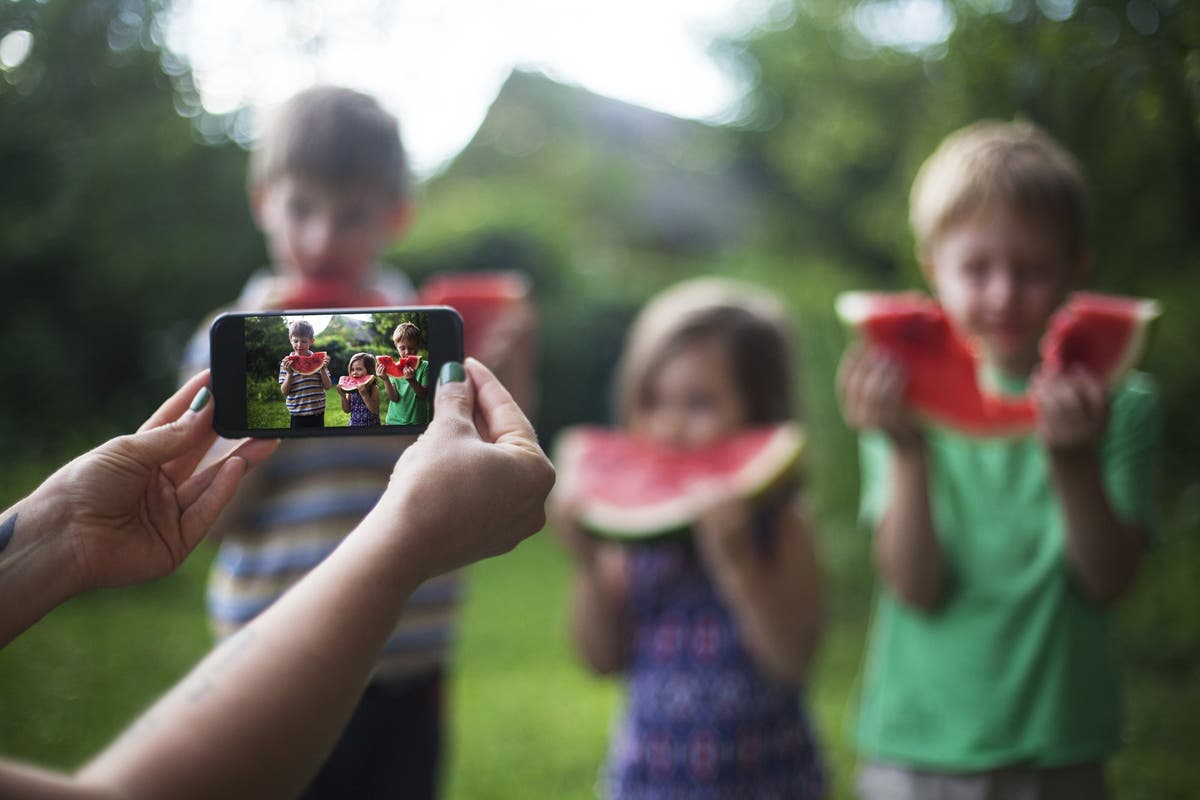
Sadly, I am not a scrapbooker. I snap dozens of photos and videos each week with my iPhone. My children will have to settle for digital archives (a masterfully designed system I might add) of their most precious memories and milestones. But first…
TWO QUICK APPS:
I went off in search of the best apps for making memory preservation easy and came across two that specialize in digital artwork preservation: ArtKive and Keepy. They both have neat sharing and editing features and fun interfaces, but as a busy mom, it’s another app to use and account to have.
- ArtKive, for some reason, makes me log in every single time I open up the app. But they do have an easy link to create a photo books, which I love.
- Keepy lets you (or family members) record video or voice messages if you want to comment on a post. There is a free and premium version.
Also, they are startups and, while I am a big fan of startups, who knows if they’ll last…30-40 years. So when it comes to keeping my photos safe and secure, I’ll put my money on the big guys.
The short answer: Skip the apps. Use private Facebook Groups for a low maintenance option, and Google for a more robust solution.
[fruitful_alert type=”alert-success”]Free Download: Get the Digital Clutter Checklist for simple recommendations on keeping your digital life organized and secure[/fruitful_alert]
The easiest and least time consuming way to keep your kids’ memories safe is to create a private Facebook group for your immediate family where you can manage your family as one (as opposed to creating separate accounts for each child). This allows you to:
- Post pictures or videos of your kids
- Photograph and post their artwork, awards etc.
- Share stories, funny moments and cute things they said
You can also organize your photos in albums.
HOWEVER, you cannot upload or move mobile photos into a specific album. You must do this from your desktop. My workaround: I move photos directly from my camera phone to my Google Drive mobile app for future desktop access. Dropbox offers similar features as well.
My other big gripe is that there is no option to filter posts by month/year, the way that you can on your main timeline. The only option is to scroll. Hopefully, this will change…in the next 30-40 years.
TIP: My extended family also has a private Facebook group (parents, siblings, spouses & kids) which we have been using for the past several years to communicate notes, greetings, share photos and videos etc. Highly recommended for all families.
If you read my post on photo and video management, you’ll know that I’m a heavy Google user and have invested in additional Google Drive storage; so this is my preferred method of documentation.
Warning 1: If you are not a Google user, perhaps this will entice you to make the switch. You can also consider using Dropbox as an alternative, which has equally powerful sharing and syncing capabilities.
Warning 2: This requires a larger investment of time, especially upfront, and I could see this becoming a challenge for people who have more than two children (due to managing multiple accounts). Once you set up the systems, though, it’s actually quite easy to manage.
Here’s the process:
Step 1. Set up Gmail accounts: Each child has their own Gmail account where I can:
- CC them on select photos, videos and other anecdotes. Even though I am backing ALL my photos up on my personal Google Drive, this is a good way to handpick some favorites and include some commentary.
- Instruct family members to email them with photos, stories or special notes.
- Optional: Create folders or tags to keep emails organized (potentially time consuming/unsustainable).
Step 2: Enable inactive account settings for each child. Google reserves the right to delete accounts that have been inactive for more than 9 months. Since you won’t be logging into these accounts regularly, it’s important that you adjust the “inactive account settings” (they can be found here). Specifically you must:
- Add your phone number.
- Adjust your “timeout” period to 18 months. Google will then alert you 3 months before this occurs.
- Add yourself (and up to 10 family members!) as a “trusted contact” who will be notified if your account is inactive and granted access to your data.
Step 3. Share documents and photos in Google Drive: This is where Google really lets you do a lot of awesome stuff:
- Share memories & stories: On my own account, I keep one document for each child where I write about their growth, development and other milestones and anecdotes. Each document is shared with my girls as a view only document.
- Share photos: At any point, I can share entire photo albums with the kids from my account.
- Digitize artwork: I use my Google Drive mobile app to photograph and auto upload selected artwork to a shared folder on my personal Drive (i.e. “Isabel artwork”). Then, I toss the actual artwork (or hang it on the fridge).
TIP: Use the Google Drive mobile app to transfer photos from your camera to your Drive. It is a lifesaver.
Step 4. Use Google Plus (Optional): This is Google’s version of a social network.
- Within their email accounts, I can download any picture or video sent to them directly to their Google Drive account. Their settings are adjusted so the files are automatically shared to their Google Plus account. This can be done within their Google Plus settings:
- What’s the point? Google’s photo stream does a nice job organizing photos by date and separating videos, so it looks like a nice photo album.
- I added myself and my husband to the “family” circle, so that we can view their photos and videos.
Step 5. Set up a Youtube channel for each child: I am only now starting to love the power of YouTube. It’s a less time and space consuming option for video management. To activate the channel, select the “Upload” button on the top right hand corner of the page. Hit “OK” when the popup appears. You can then decide whether you want your videos to be public or private.
- Direct mobile to YouTube upload. In YouTube settings, you will see an email address that allows you to email any video directly to your YouTube account. How awesome is that?
- Remember, you must have an active YouTube channel to use this feature.
- Add the email addresses as contacts in your phone, since they are a mix of letters and numbers.
- Edit & upload. For the videos you edit down, upload them directly from your desktop and delete the raw footage.
Step 6. Adjust privacy settings: After all is said and done, Go back to Gmail, Google Plus, Google Drive and YouTube to review each and every privacy, sharing and notification setting. I made some adjustments to limit who could view their digital data and will review these periodically.
And this, folks, is how I plan to preserve my kids’ memories.